File Importer - Convert files into MSH uploads
The File Importer is the fastest way to get a supplier’s stock list or quote into IATA MRO SmartHub. It takes any XLSX, XLS or CSV — with its inconsistent headers, condition codes, and formatting — and produces either a Procurement Cockpit listings package or an Evaluator material list, without you needing to hand-edit a template first.
This tutorial walks through the end-to-end path for a common scenario: a supplier sends an Excel workbook with two sheets, you want to load it into the Procurement Cockpit as a new supply package.
For the full field-by-field reference of every step, see File Importer.
Getting started
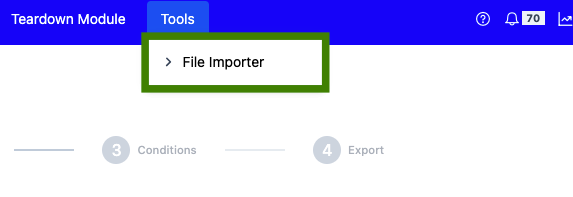
Open IATA MRO SmartHub and go to Tools › File Importer in the top navigation. If the entry is missing, ask your company administrator to grant access.
Workflow — Import a supplier file into the Procurement Cockpit
You should have the supplier workbook saved locally. The importer never uploads the source file, so there is no need to strip anything sensitive beforehand — only the resulting CSV is submitted to IATA MRO SmartHub.
Step 1 — Drop the file
Drag the workbook onto the drop zone (or click Choose files and select it). All sheets are read at once. A one-line message confirms the filename and how many sheets were found; the sheet-by-sheet view opens automatically as Step 2.
Tip
Drop multiple files at once if the supplier splits an offer across several workbooks. The first filename you drop becomes the output filename prefix — you can change it later in Step 5.
Step 2 — Pick the sheets and header rows
Every sheet is listed under the file it came from. By default all
sheets are included and the header row is row 0.
Untick any sheet you do not want to include (summary tabs, pricing terms pages, unrelated inventories).
If a sheet has a title block above the real header, click Auto-detect or type the correct row number in the Header row input. The preview table refreshes immediately.
If a supplier column uses merged cells (typical: the manufacturer is written once and left blank for the rows below), expand Extended settings and tick that column under forward-fill blanks. Columns with ≥ 20 % blanks carry a yellow
% blanktag so you can spot them at a glance.
Click Proceed to mapping when the preview looks right.
Step 3 — Map the columns
The importer tries to auto-map every target field using your company’s synonym catalogue. If this is your first import, expect a handful of unresolved fields; if you have imported before, most fields should already be resolved. The banner at the top tells you how many.
For every unresolved mandatory field (
part_number,qty), pick the matching column from the dropdown. Use the search inside the dropdown to filter.Fill in the optional fields you care about —
description,price_usd,serial_numberif the file is serialised, andcommentif there is a free-text note column worth carrying across.For fields that don’t exist in the supplier file but that you want to attach as a constant (e.g.
applicability = "737NG"), switch the mode to Constant and type the value.Watch the Live preview at the bottom — five key columns refresh as you map, so you can spot obvious mistakes (wrong column, off-by-one row) immediately.
Note
The mfr column is derived automatically from the source
filename and sheet name. It is not part of the mapping table.
This guarantees every row keeps a trace back to its origin.
Every mapping you set is saved to your company’s synonym catalogue on submit. The next file with the same source columns will be auto-mapped for you.
Click Continue.
Step 4 — Normalise the conditions
Each distinct raw condition value found in the file appears in the
table with its row count. Known values are pre-mapped; unknown ones
are blank and fall back to the Default setting above (AR unless
you change it).
For every unmapped raw value, pick a canonical code from the dropdown. Focus on the ones with a high row count first.
Change the Default if
ARis not appropriate for this file (for example,NEfor a new-parts catalogue).Tick Stash original condition in mfr if you want the original supplier condition preserved in the
mfrfield. Recommended for mixed-quality feeds where the raw text might carry useful nuance (e.g."OH w/8130-3").Leave Rewrite CUE-domain parts to NE ticked unless you have a specific reason to keep other conditions on consumables and expendables.
Click Continue. Your new mappings are staged for the dictionary.
Step 5 — Preview and submit
The final step shows the fully-processed rows on two tabs:
Procurement — the shape the Procurement Cockpit expects.
Material List — the shape Evaluator › Lists expects. Zero-qty rows are dropped here.
Because this walkthrough is for the Procurement Cockpit path:
Stay on the Procurement tab.
Optionally change the Output filename prefix — the CSV filename uses
<prefix>-<timestamp>.csvand the package name in the dialog defaults to the prefix.(Optional but recommended.) Click Download procurement CSV to keep an archived copy of the CSV that will be posted.
Click Add to Procurement Cockpit. A dialog asks for the package name and supplier. Fill them in and click Add listings.
A sticky success toast confirms the upload. Click Open on the toast to jump directly to the new package under Procurement Cockpit › Supply.
Variation — Create a material list instead
If your goal is to evaluate the file rather than list it as supply, switch to the Material List tab in Step 5 and click Create material list. The dialog asks for the list name and an optional partner. On success the toast deep-links to the new list under Evaluator › Lists, ready to be evaluated exactly like a list created via the standard upload flow (Lists).
Tips
Multiple suppliers in one output. Drop all their files in Step 1 (or use Add more files in Step 2). The
mfrcolumn keeps the per-sheet origin, so you can trace every row back afterwards.The catalogue learns. Force yourself to map every relevant field the first time you see a supplier — the third and fourth import from the same source usually needs no manual mapping at all.
Download before submit. For irregular or high-value uploads, the Download CSV button gives you an archivable snapshot of what was posted, independent of the destination package or list.
Where to go next
File Importer — full field-by-field reference.
Procurement Cockpit — how to work with the package once it lands in the Procurement Cockpit.
Lists — how to work with the material list once it is created.